09 Feb How to Freeze Okra for Boiling? Expert Tips for Preserving Flavor
To freeze okra for boiling, start by blanching the okra in boiling water for 3 minutes, then transfer them to an ice bath to cool completely. Once cooled, drain the okra thoroughly, and place them in a single layer on a baking sheet. Freeze the okra on the baking sheet for 1-2 hours, or until they are firm. Finally, transfer the frozen okra to airtight freezer bags or containers, and return them to the freezer for long-term storage. Are you a fan of deliciously tender and flavorful okra, but worried about it going bad before you can use it all?
Freezing okra is a practical and efficient method to preserve its freshness, especially useful for those who enjoy this versatile vegetable in various recipes like boiling or frying. Whether you’ve had a fruitful harvest from your garden or stumbled upon a fantastic deal at your local grocery store, freezing okra ensures that you can savor its taste and nutritional value all year round. This guide, brought to you by https://localvaluemagazine.com/, will provide a step-by-step process on how to freeze okra for frying and boiling. By adhering to these straightforward instructions, you can maintain the quality and flavor of okra, making it ready for cooking whenever you desire.
Selecting Fresh Okra

When it comes to freezing okra for boiling, selecting fresh okra is essential to ensure the best results. The freshness of the okra determines the flavor and texture after freezing. Here are some important points to remember when choosing fresh okra:
Choose Fresh And Firm Okra
Choose okra pods that are fresh and firm to the touch. Look for pods that are bright green and feel slightly crisp when you squeeze them gently. Fresh okra retains more flavor and nutrients, providing a better taste experience when cooked later.
Avoid Overripe Or Blemished Okra
Avoid overripe or blemished okra as these may not freeze well and could affect the quality of your frozen okra. Overripe okra is often discolored and limp, while blemished okra may have spots or bruises. Choosing okra without any visible signs of damage ensures a better outcome when you defrost and cook it later.
If you are unsure about the freshness of the okra, you can also check the stem end of the pod. It should be green and not dry or hardened. Additionally, the pod should snap easily when bent, indicating freshness.
Moreover, always remember to wash the okra thoroughly before freezing it to remove any dirt or residue that may be present on the surface. By taking the time to select fresh and firm okra, you can ensure a delicious and satisfying meal later on when you boil your frozen okra.
Prepping The Okra
Properly prepping the okra before freezing is crucial to ensure that it maintains its quality and taste when boiled later. This involves washing and drying the okra pods and trimming the ends. Let’s take a closer look at each step:
Wash And Dry The Okra Pods
Thoroughly washing the okra pods is essential to remove any dirt or residue that may be on them. Start by rinsing the pods under cool running water.
Be sure to gently rub each okra pod with your hands to remove any stubborn dirt.
Once washed, place the pods on a clean towel or paper towel to dry them completely.
Allowing the okra pods to air dry ensures that no water droplets remain, which can result in freezer burn when frozen.
Trim The Ends Of The Okra Pods
Trimming the ends of the okra pods is necessary to remove any tough or woody parts, making them more enjoyable to eat later on.
Take a sharp knife and carefully cut off both ends of each okra pod.
Dispose of the trimmed ends, and make sure to cut them at a slight angle, which helps the okra cook more evenly when boiled.
By following these simple steps, you can confidently prepare your okra for freezing and enjoy deliciously boiled okra whenever you crave it!
Blanching The Okra
Blanching the okra is a crucial step in the process of freezing okra for boiling. Blanching helps to preserve the okra’s color, texture, and flavor, making it a perfect addition to your favorite recipes. By following the steps below, you can ensure that your okra is properly blanched and ready to be frozen for future use.
Prepare The Blanching Pot
Before blanching the okra, it’s essential to prepare a blanching pot. Start by filling a large pot with water and bringing it to a rapid boil. Ensure that the pot is large enough to accommodate the okra without overcrowding, as this can affect the blanching process.
Blanch The Okra Pods
Once the blanching pot is ready, carefully place the fresh okra into the boiling water. Blanch the okra pods for about 3-4 minutes, depending on their size. It’s crucial to monitor the pods closely and avoid overcooking, as this can result in mushy okra. After blanching, promptly remove the okra from the boiling water and place it in an ice water bath to halt the cooking process.
Freezing The Okra
To freeze okra for boiling, start by washing and trimming the pods. Then, cut them into desired sizes and blanch them in boiling water. Afterward, cool them quickly in an ice water bath and place them in freezer bags. Make sure to remove excess air before sealing and label with the date before freezing.
Freezing okra is an excellent way to preserve its freshness and enjoy this versatile vegetable all year round. Once you have blanched the okra, the next step is to freeze it. Here’s a step-by-step guide on how to freeze okra for boiling:
Cool The Blanched Okra
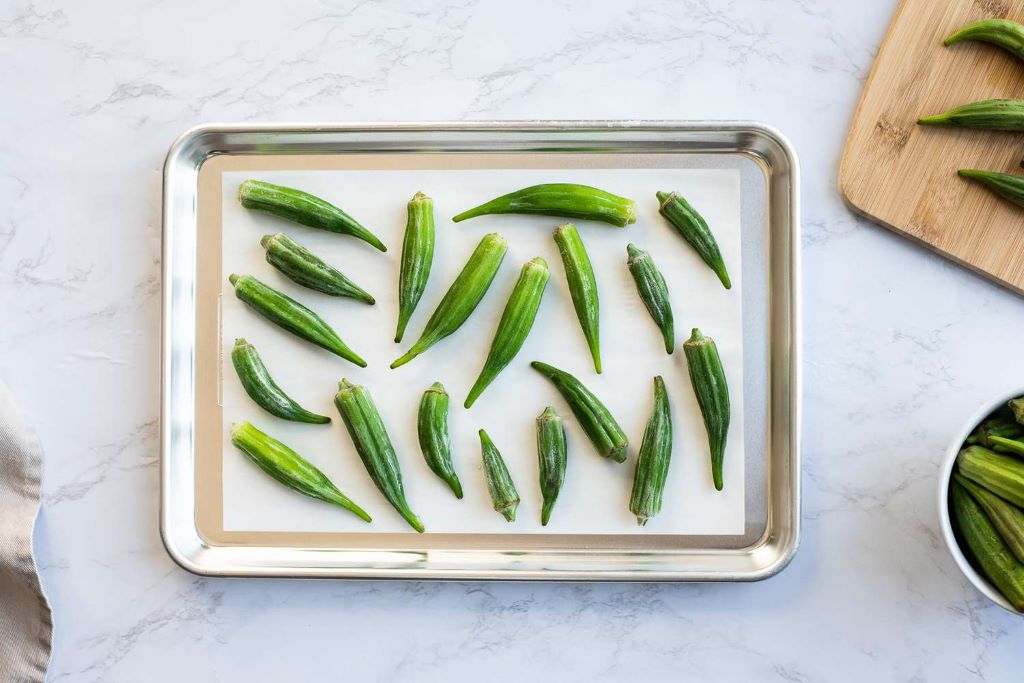
After blanching the okra, allow it to cool completely before freezing. This step ensures that the okra retains its texture and flavor when thawed. Spread the blanched okra in a single layer on a baking sheet or tray, making sure they are not touching each other. Place the tray in the freezer and let the okra cool for about an hour or until they are firm to the touch.
Arrange And Seal The Okra For Freezing
Once the okra is fully cooled, it’s time to arrange and seal them for freezing. There are a few different methods you can use:
- Plastic Bags: Place the cooled okra into resealable plastic bags, ensuring that you remove as much air as possible before sealing. Label the bags with the date and contents, then place them back in the freezer. This method allows you to portion out the okra and easily grab the amount you need for boiling.
- Freezer Containers: Alternatively, you can use freezer-safe containers to store the okra. Arrange the cooled okra in a single layer inside the containers, leaving a little space at the top to allow for expansion. Seal the containers tightly and label them with the date and contents before placing them in the freezer.
- Vacuum Sealer: If you have a vacuum sealer, it’s an excellent way to preserve the okra. Simply place the cooled okra in vacuum-sealable bags, following the manufacturer’s instructions. Vacuum seal the bags and label them before freezing.
No matter which method you choose, always make sure to seal the okra tightly to prevent freezer burn and maintain its quality. Stored properly, frozen okra can last up to 12 months in the freezer. Now that you know how to freeze okra for boiling, you can stock up on this nutritious vegetable and enjoy its delicious taste even when it’s out of season. Plus, freezing okra is a convenient way to save time in the kitchen. So go ahead, freeze some okra today, and have it readily available for your next batch of boiled okra.
Tips For Preserving Flavor
Learn how to freeze okra for boiling to preserve its flavor and freshness. These simple tips will help you enjoy the taste of okra even when it’s out of season.
Labeling And Dating The Okra
Properly labeling and dating your frozen okra is crucial for easy identification and maintaining freshness. This simple step will save you time and effort when you’re ready to cook.
- Using a waterproof marker, write the current date on the freezer bag or container before filling it with okra. This will help you keep track of how long the okra has been frozen.
- Label the bag with the word “Okra” to make it easy to identify in your freezer. You can also add any additional information, such as the type of okra or its intended use (e.g., “sliced for gumbo”).
- Place the labeled bags or containers in the freezer, ensuring they are stored flat to maximize space. This will prevent any potential spills or leaks.
Using Vacuum-sealing For Enhanced Preservation
To further enhance the flavor and preservation of your frozen okra, consider using a vacuum-sealing method. This technique removes excess air from the packaging, providing a practically airtight seal and preventing freezer burn.
Here’s how you can vacuum-seal your okra for optimal freshness:
- Ensure the okra is completely dry before packaging it. Moisture can negatively affect the quality of frozen okra.
- Place the okra in a vacuum-seal bag or use a vacuum-sealing attachment for your regular freezer bags. Make sure to leave a small space at the top of the bag for sealing.
- Follow the manufacturer’s instructions for your vacuum-sealing device to remove the air and seal the bag tightly.
- Label the vacuum-sealed package as mentioned above, including the current date and any additional information about the okra.
- Store the vacuum-sealed okra in the freezer, taking care to organize and stack them accordingly to maximize space.
By using vacuum-sealing, you’ll not only preserve the flavor of your frozen okra but also extend its shelf life, ensuring your okra will taste delicious when cooked.
Frequently Asked Questions For How To Freeze Okra For Boiling
Can You Freeze Fresh Okra For Boiling Later?
Yes, you can freeze fresh okra for boiling later. Freezing okra preserves its flavor and texture, making it perfect for future use in soups, stews, or as a side dish. To freeze okra, blanch it first, then spread it out on a baking sheet and freeze.
Once frozen, transfer the okra to airtight containers or freezer bags.
How Long Can You Freeze Okra?
You can freeze okra for up to 12 months without significant loss of quality. However, it is recommended to use it within 6 to 8 months for the best flavor and texture. Properly stored okra will remain safe to eat indefinitely, but the quality may deteriorate over time.
What Is The Best Way To Thaw Frozen Okra?
The best way to thaw frozen okra is to transfer it to the refrigerator and let it thaw overnight. This slow thawing process helps maintain the okra’s texture and flavor. Alternatively, you can place the frozen okra in a sealed bag and submerge it in cold water until thawed.
Avoid thawing okra at room temperature, as it can promote the growth of bacteria.
Conclusion
Learning how to freeze okra properly can ensure that you always have this versatile vegetable on hand. Natural healthy food is all about consuming ingredients that are minimally processed and rich in nutrients; by following the simple steps outlined in this guide, you can maintain the okra’s quality and extend its shelf life, ensuring that freezing okra for boiling has never been easier!
Sorry, the comment form is closed at this time.